


Loading…
Something went wrong. Please refresh the page and/or try again.
Advertisements
Loading…
Something went wrong. Please refresh the page and/or try again.
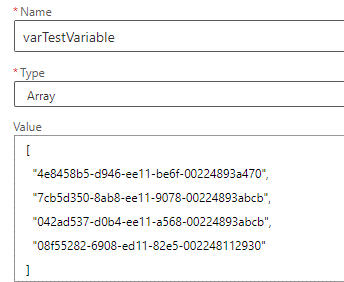
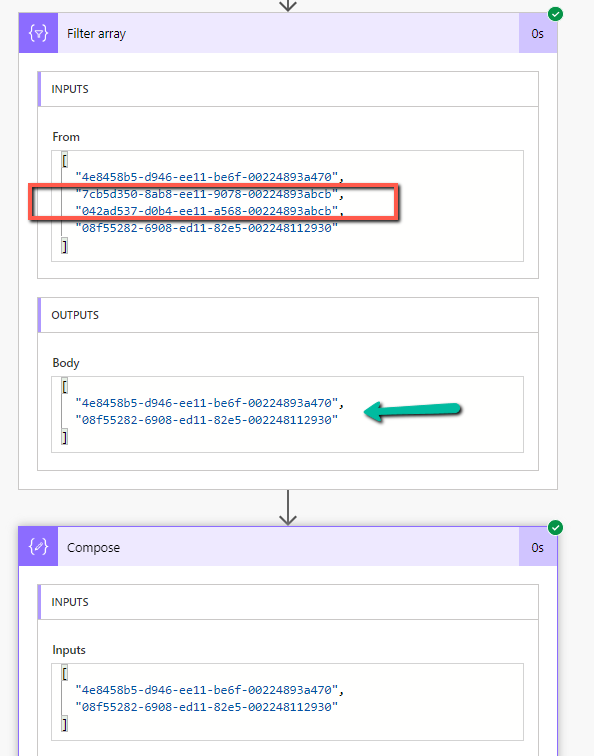
Suppose we have below array variable – varTestVariable having a list of GUIDs in it.
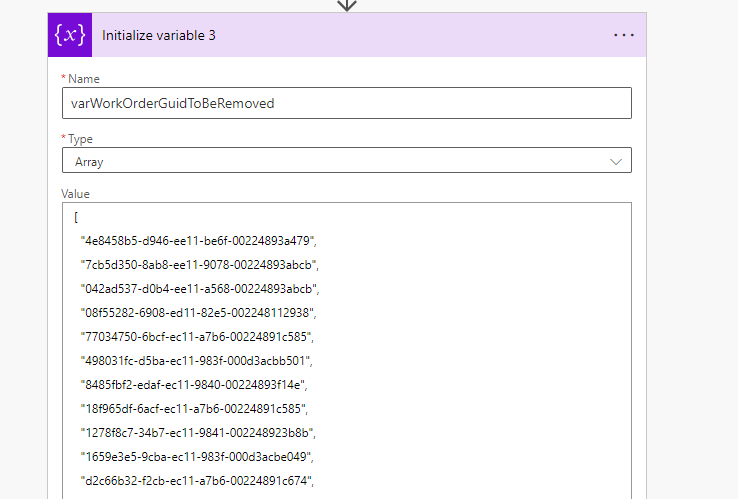
And we have another array variable varWorkOrderGuidToBeRemoved which has the list of GUIDs we want to remove from our first variable varTestVariable
For this, we can make use of the Filter array action
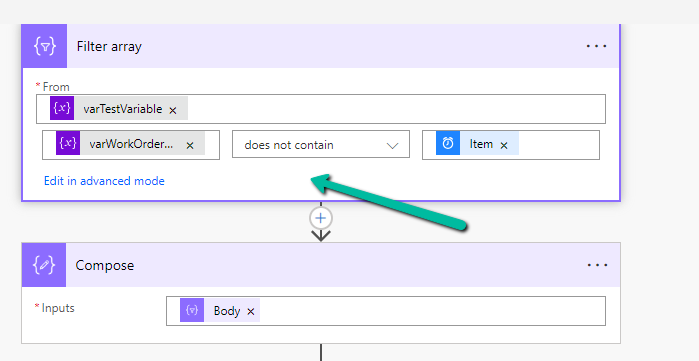
In From, first we have specified the array variable from which we want to remove the values, followed by the variable that holds the values to be removed. Next, we have specified the “does not contain” operator and finally specified the item()
We can also click on Edit in advanced mode to see or edit the expression.
We can use the Body of the Filter array action that will hold the result in subsequent actions.

On running the flow, we can see that the values that existed in the second array variable were removed from the first array variable.
Get more details – https://www.damobird365.com/efficien-union-except-and-intersect-great-method/
Hope it helps..
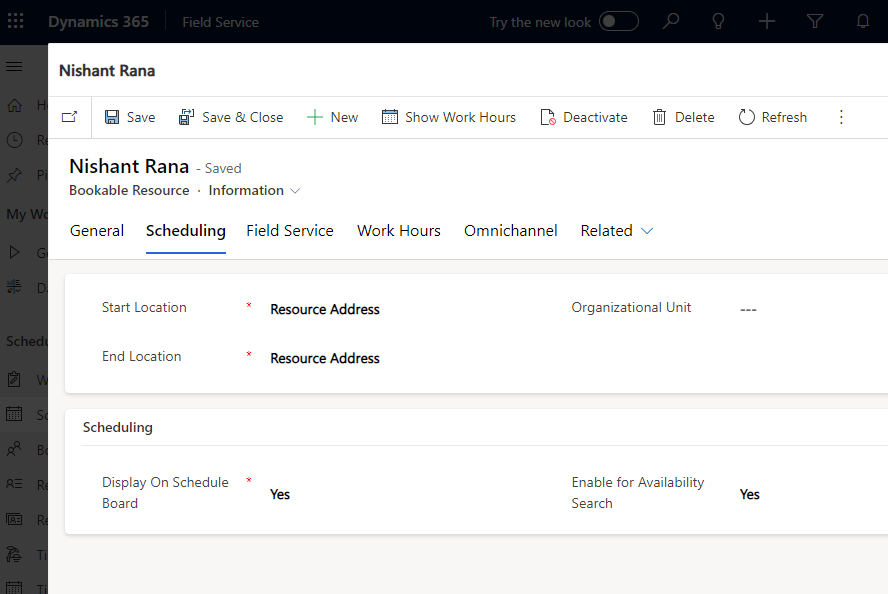
While trying to set the Start Location / End location to the Resource Address for Bookable Resource, we might get the below error
Exception Message: The latitude or longitude for the User record associated with this resource is invalid. Please provide a valid latitude and longitude and then set the start and end location for this resource again.

Here as the error message specifies we need to specify the latitude and longitude value for the corresponding resource type record associated with the Bookable Resource.
In the case of Contact, we can use the Geo Code option, and specify the address to populate the Latitude and Longitude details.

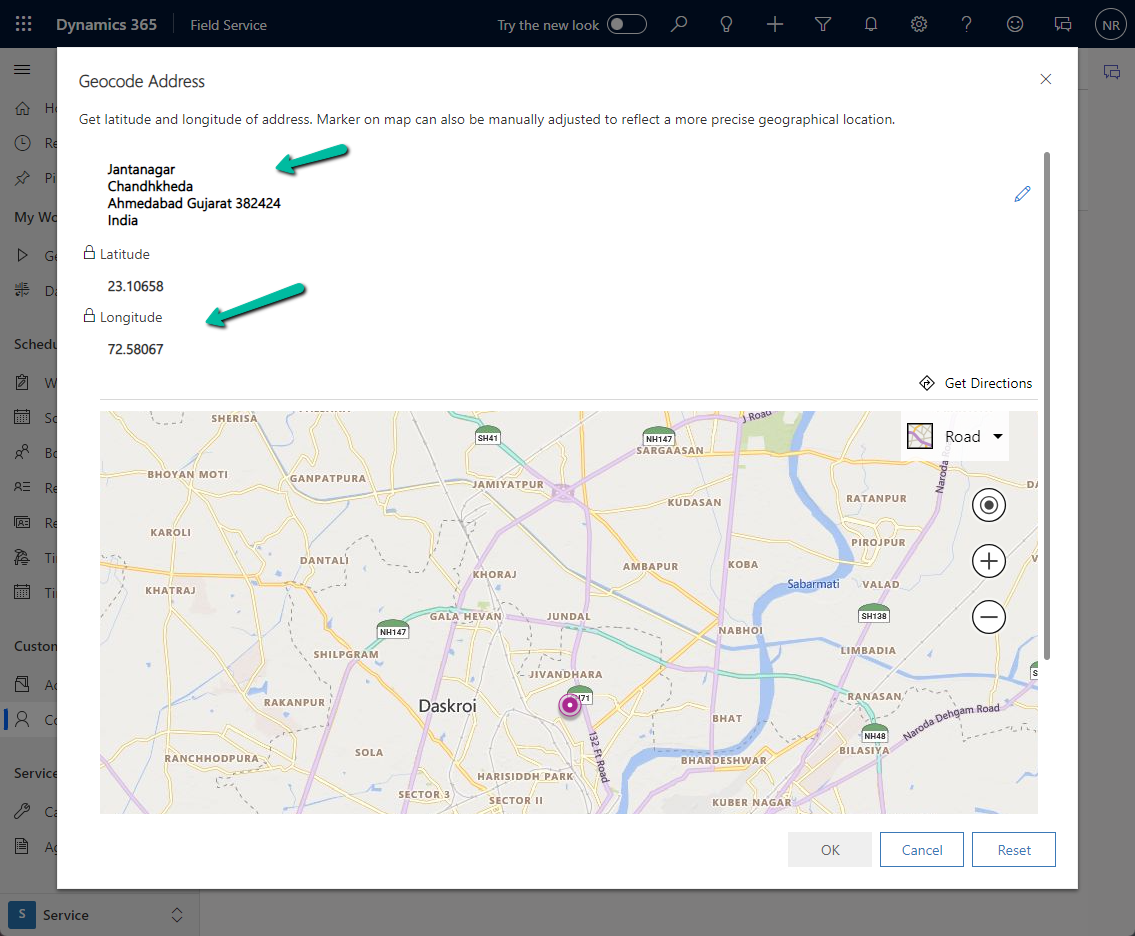
In the case of a User record we do not see the Geo Code option so there we can manually specify the values for it.

Now we will be able to update the Start / End Location as Resource Address in our Bookable Resource record, without getting any error.
Get more details on Geocoding
Hope it helps..
We can track the different locations Field Service technicians have traveled or where they are at a given time inside Dynamics 365 Field Service. Field Service Technicians can enable location sharing from the app, and based on the Geolocation Settings configured, we can see the technician’s location in the schedule board and also list location history through the Geolocation Tracking record.
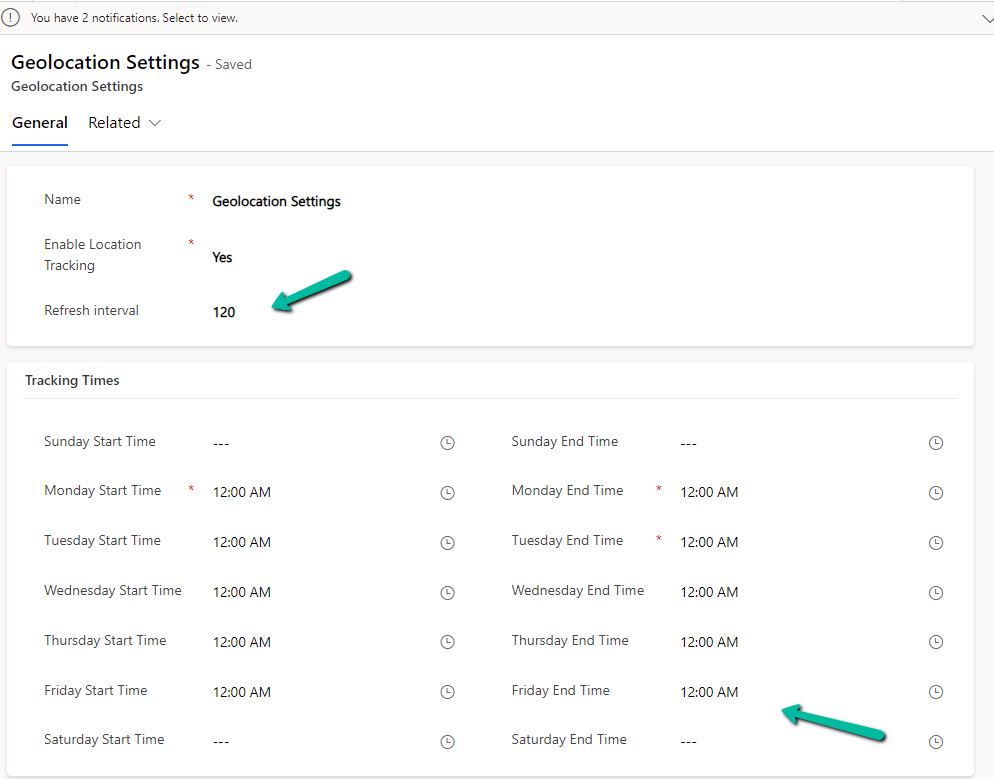
Navigate to Settings >> Geolocation >> Geolocation Settings.
By default, the Geolocation Settings will have Enable Location Tracking as No and Refresh Interval as 60 seconds.

Below we have updated the Geolocation Settings, updated the Refresh Interval to 120, and specified Tracking times for Monday to Friday, 24 hours.
Refresh Interval specifies how frequently the system will check the user’s location, not the frequency for the creation of “Geolocation Tracking” records.
Geolocation Tracking records are created on Sign In, when a user moves more than 200 meters, and when the user comes to a still position after moving.
In the Field Service App, the technician has the location enabled in the settings.
Back in the Schedule Board, we can see the current location of the Field Service technician. (If we are specifying the Start / End location as the Resource Address for the Bookable resource, we will have to specify the latitude and longitude for the associated resource record)

Below we can see the corresponding Geolocation Tracking records created.

Get more details on Location Auditing.
Hope it helps..
Recently in one of our flow triggers – When a row is modified (Dataverse), we got the below error

Exception parsing _msdyn_billingaccount_value eq ‘a84c5028-ecdf-ed11-a7c7-00224893b2b0’ submitted for attribute filterexpression of callback registration. Target entity: msdyn_workorder. Exception: Microsoft.OData.ODataException: A binary operator with incompatible types was detected. Found operand types ‘Edm.Guid’ and ‘Edm.String’ for operator kind ‘Equal’.
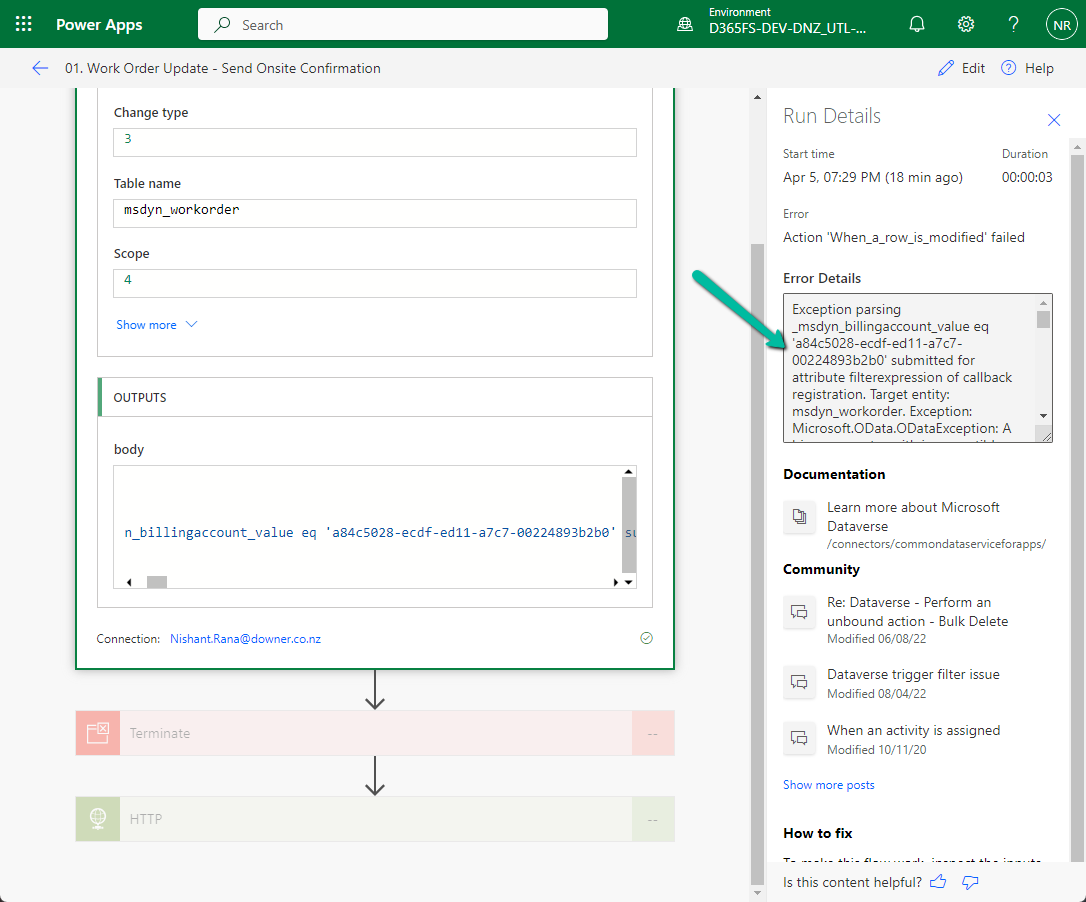
This is because we were using single quotes around the GUID value in the Filter rows property.

We need to remove the single quotes around the GUID
GUIDs are considered a primitive data type in OData and should be represented as raw values without quotes. By removing the single quotes, we’ll ensure that the GUID is treated as a valid identifier in our filter condition.
Hope it helps..
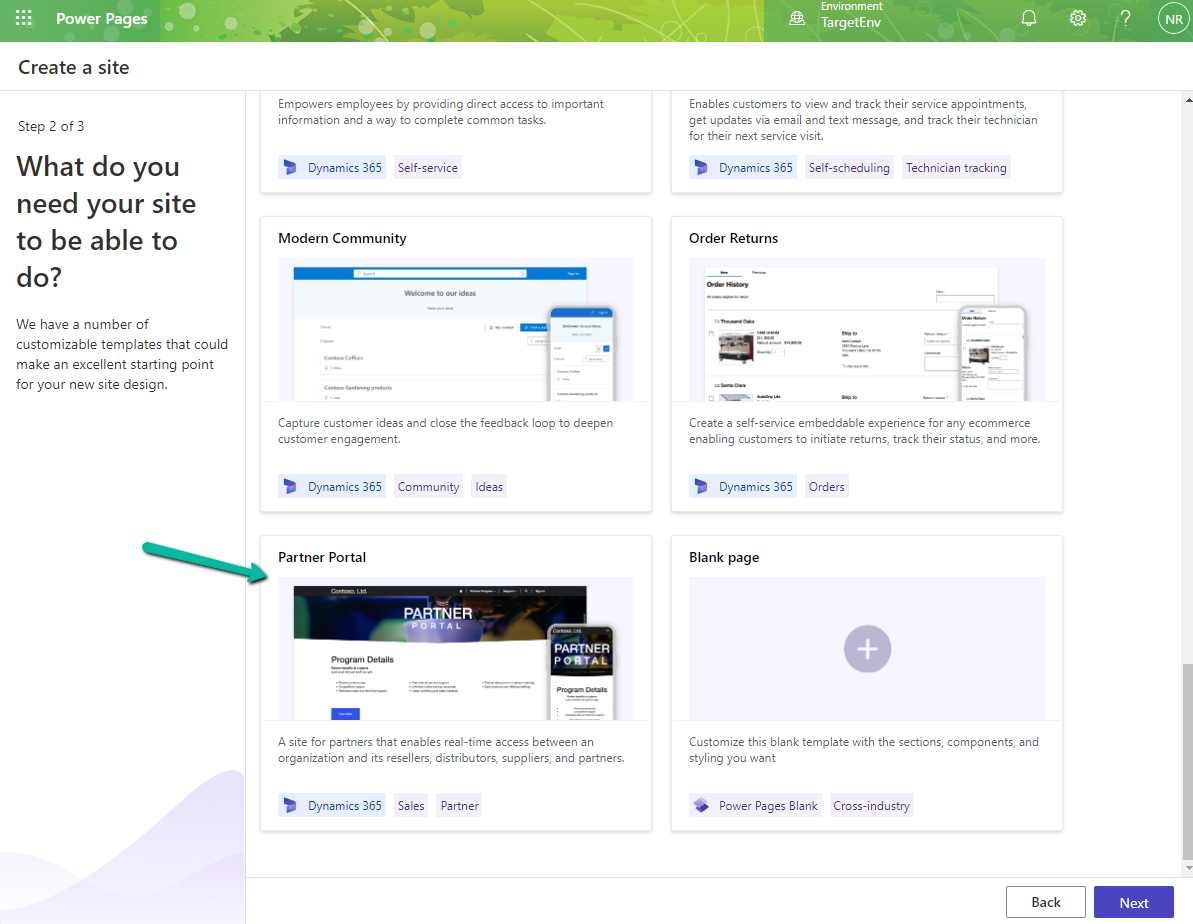
While trying to create a Website with Template – Partner Portal,
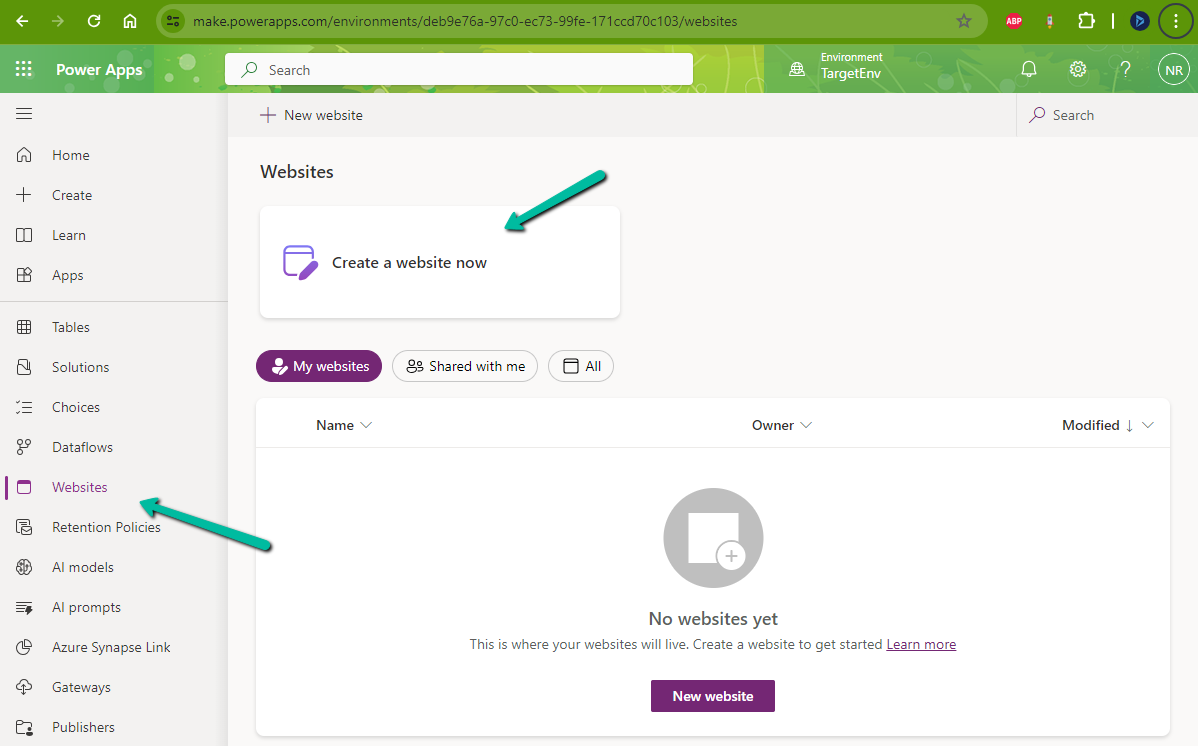
we observed the provisioning stuck at – Getting set up…
Also, it was showing the below error on checking the Site Health.
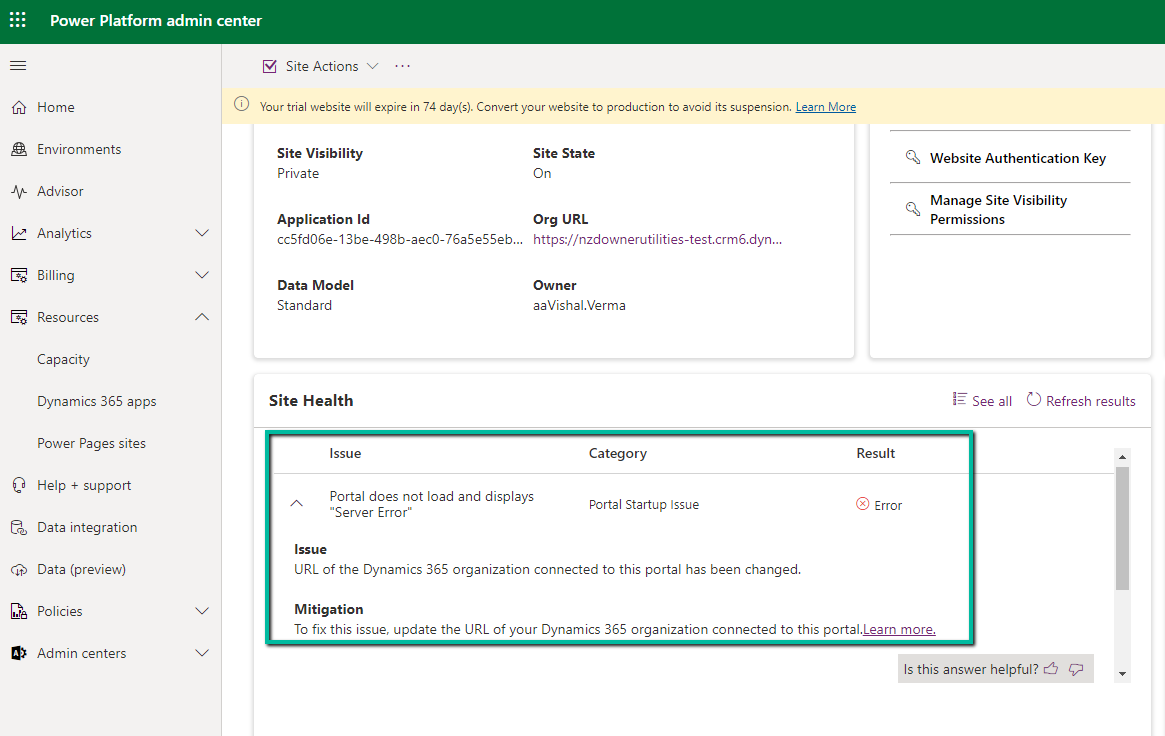
“URL of the Dynamics 365 organization connected to this portal has been changed.” Which wasn’t the case as the URL of the organization was correct.
Usually, the 1st Web Site takes time around an hour and then any new website is provisioned within 15-20 minutes (as the common / base solutions are already installed). This was the first website for that environment, however, when it was more than 24 hours, we then raised a Microsoft Support Ticket for it.
Microsoft acknowledged this as a bug and also got the fix ready, but there was a delay in deploying it because of dependencies internally.
In parallel, they also provided us with a workaround, which fixed the issue for us.
The steps are as follows –
If Customer Self-Service Portal is not needed, the website can be deleted then, followed by deleting the below Managed solutions specific to Customer Self-Service.
Also delete the website records created specific for Customer Self – Service Portal – https://www.youtube.com/watch?v=i9jeWaO93IM&ab_channel=EngineeredCode
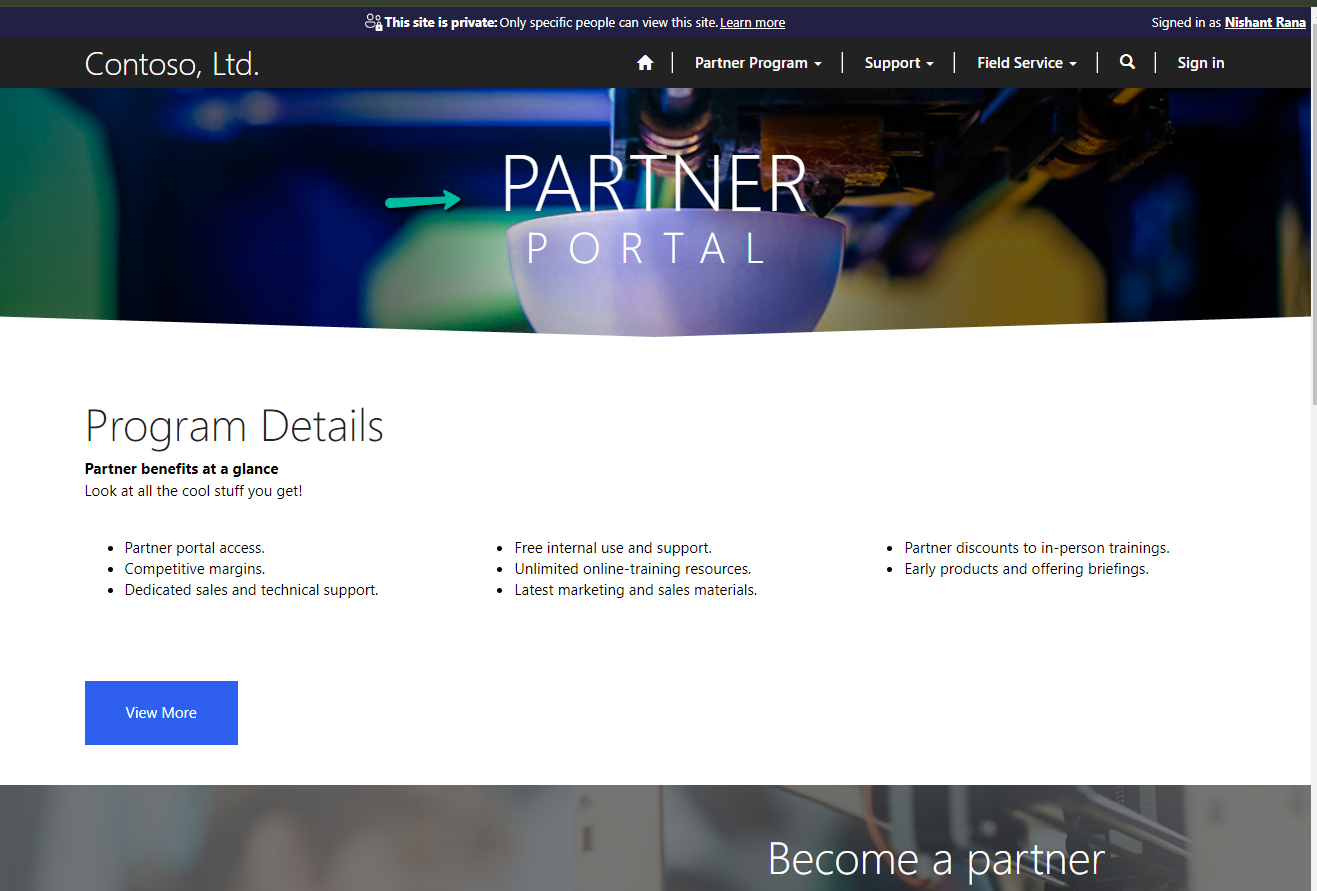
We followed the above steps and got the Website with the Partner Portal template created successfully.
Hope it helps..
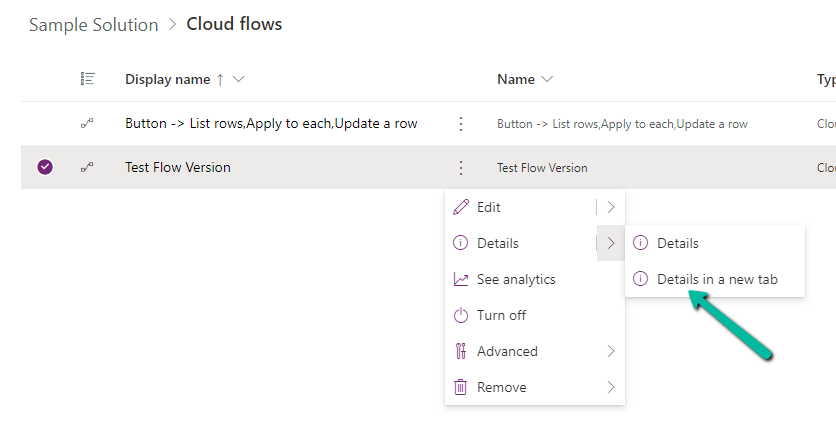
We now have the version support for Cloud Flows in Power Automate.
This feature is only available in the new editor.
Let us start by creating a simple flow, the creation part will happen in the existing editor.
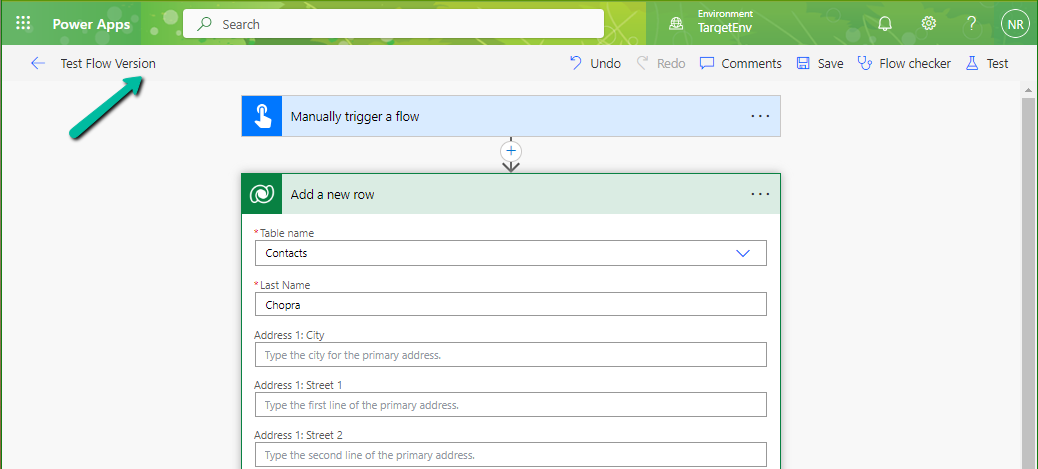
Let us save the flow, and select Edit >> Details in a new tab to open it in the new designer inside Power Automate Maker Portal

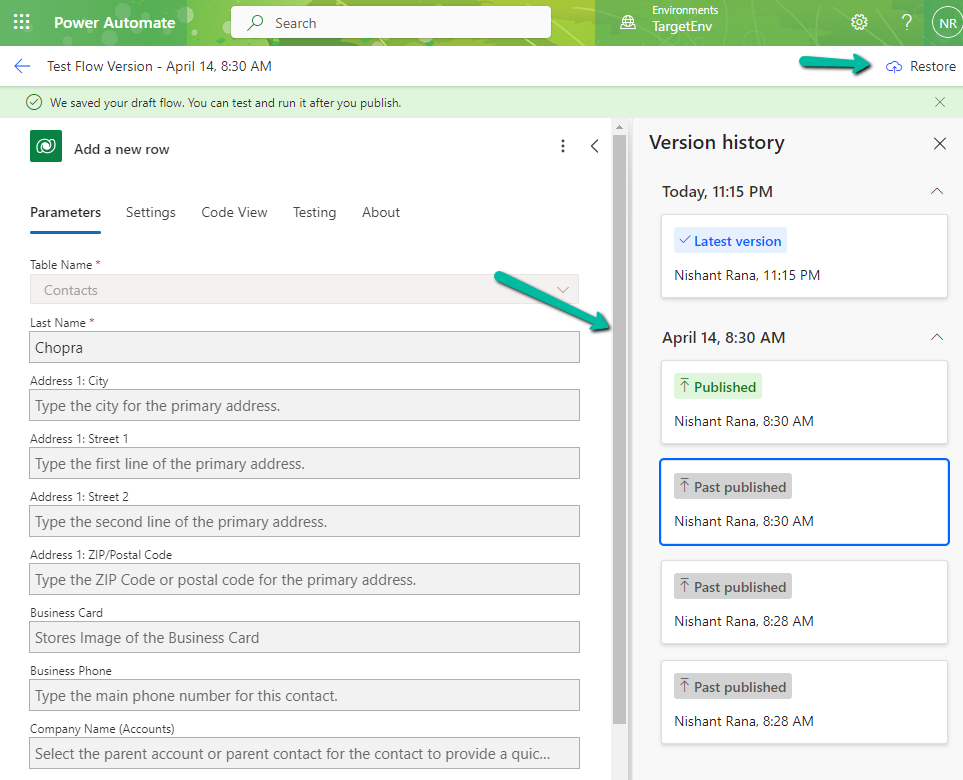
Below we have made changes to the flow and clicked on Save Draft.
Clicking on Save Draft changes the flow to Draft and shows the message “We saved your draft flow. You can test and run it after you publish”

From the Version History, we can see the Latest Version, Published Version, and the Past Published version, with the option to Restore it.
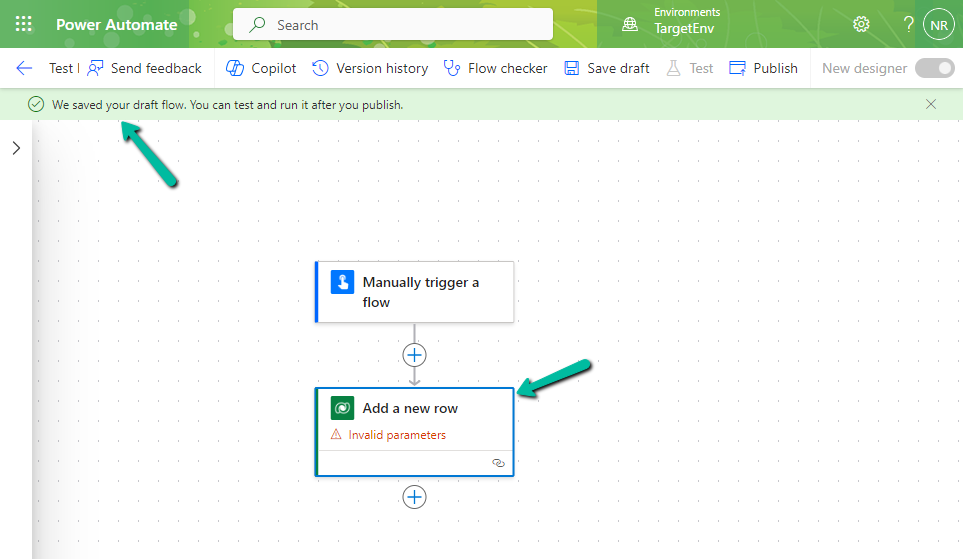
We can save a draft of a flow even with errors now.
Check for more details – Draft and Versioning for Cloud Flows
Hope it helps..
